
Acoustic Treatment for a Podcast Room: DIY vs Panels


For most podcast rooms, free soft furnishings, a thick rug, heavy curtains, a full bookshelf, a hanging blanket, kill more echo per dollar than anything you can buy, because they cover large surfaces at zero cost. Buy foam or rigid panels only after the soft stuff, and choose rigid mineral wool over foam if your room booms. Here's the spending order, ranked by cost-per-decibel.
Most beginners spend on the wrong thing first. After setting up home rigs from $150 to $5,000, my own take is blunt: the gap between a $150 and a $1,500 setup matters less than the gap between bad mic technique in an echoey room and good technique in a treated one. The room shapes your sound more than the mic does. A starter podcast can be built for under $200 (Ausha), and most of that should go to the mic, not foam. Before you spend on panels, know what you're fixing and in what order.
What acoustic treatment actually fixes (and what it doesn't)
Treatment fixes reverb, the echo of your voice bouncing off hard walls, floors and ceilings and arriving at the mic a fraction of a second after you speak. That smear is what makes home recordings sound "roomy" or "boxy," and it's nearly impossible to remove cleanly in editing, so you prevent it at the source (Buzzsprout).
Treatment does not block outside noise. If you can hear traffic, a dishwasher, or neighbours through the wall, that's a soundproofing problem, a construction job involving mass and sealed gaps, not foam (Soundproof Cow). Foam glued to a wall does almost nothing for noise transfer. Conflating the two is the single most expensive mistake new podcasters make: they buy a wall of foam expecting silence and get a slightly-less-echoey room that still picks up the street. The full breakdown of soundproofing vs acoustic treatment is worth a read before you spend.
For a speech podcast, treatment is the priority and it's cheap. Soundproofing is the priority only if you genuinely can't control when the noise happens, and even then, a dynamic mic built for an untreated, noisy room does more for less than a renovation.
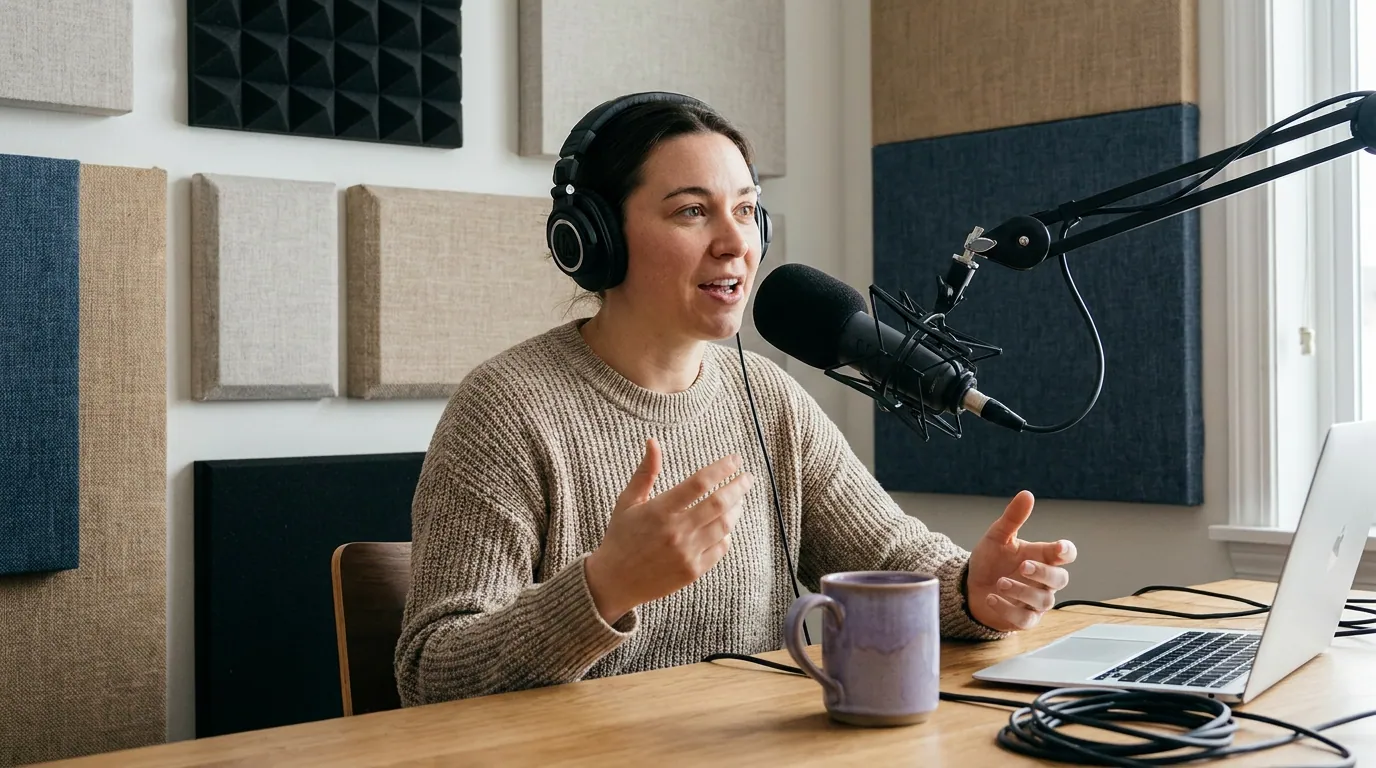
The cost-per-decibel ranking
Here's the order I'd spend in, cheapest-per-result first. The "echo reduction" column is directional, it ranks the fixes by how much broadband absorption you get for the money, not a lab measurement of your specific room. Treat it as a spending sequence, not a spec sheet.
Notice foam sits at the bottom. That surprises people, because foam is what every "podcast studio" stock photo shows. The catch is coverage: a typical foam tile is 12 by 12 inches, one square foot, and only absorbs mid-to-high frequencies. A single heavy curtain or a packed bookshelf covers fifteen times the area and costs nothing extra if you already own it.
1. Pick the right room (free)
Before any product, choose your space. Small, soft, and quiet beats large, bare, and echoey. A bedroom with a bed, rug and curtains already absorbs a lot; a bare kitchen or garage is a reflection machine. A walk-in closet packed with clothes is the closest thing to a free booth: the hanging clothes absorb your voice, and the door gives you some isolation. Buzzsprout points to the clothes-packed closet as a budget go-to, and flags the catch in their guide, it's solo-only, so don't try to record a guest in there (Buzzsprout).
2. Rug, curtains, and a full bookshelf (free to ~$40)
These three handle most of what a beginner needs. A thick area rug on a hard floor kills the floor reflection, the one most people forget, because they treat the walls and ignore the ground. Heavy, dense curtains over windows absorb mid-highs and double as light noise blocking. A full, irregularly-stacked bookshelf is a genuinely good diffuser: the uneven spines scatter sound instead of bouncing it straight back (Soundproof Cow).
If you already own these, your cost is zero. If you're buying, a rug and a curtain rod run under $40 and you keep the furniture forever.
3. Moving blankets (~$6–10 each)
The budget workhorse. Heavy moving blankets, the film-set "furniture blanket" Buzzsprout points to, the kind Harbor Freight sells in 72-by-80-inch size for roughly $6–10 each (often closer to $3–6 on sale) (Buzzsprout), hang on reflective walls and absorb mid-to-high echo well. Hang them with adhesive hooks or a tension rod, and leave a 2–3 inch air gap behind them if you can. That gap is not a small detail: VocalBoothToGo measured a blanket hung 3 inches off the wall at NRC 0.8 versus only NRC 0.5 flat against it, roughly a 40% jump in absorption from the gap alone (VocalBoothToGo).
The honest limit: plain moving blankets carry no NRC rating, so you can't calculate how many you need, and they're too thin to touch real bass (Second Skin Audio). For a speech podcast in a small room, that's fine, bass isn't your problem; smeared mid-highs are. Purpose-built acoustic blankets do test higher (the Producer's Choice line measures NRC 0.8) but cost far more, around £30 / $30+ each (The Podcast Host), which usually isn't worth it over a cheap moving blanket plus the air gap.
4. DIY mineral-wool panels (~$19 per panel)
This is the sweet spot for anyone who wants studio-grade results without studio prices. Buy raw 2-inch mineral wool (rockwool) board, a box of six 24-by-48-inch panels runs $114, about $19 each (buyinsulationproductstore), build a simple wood frame, and wrap it in breathable fabric. Each finished panel covers 8 square feet, eight times the area of a foam tile, and absorbs a far broader frequency range. Two-inch mineral-wool board tests at an NRC of roughly 0.95 to 1.05, essentially absorbing all the sound that hits it across speech frequencies (GreenBuildingAdvisor).
A weekend of building gets you near-professional treatment for a fraction of bought-panel money. The trade is your time and a few tools.
5. Bought rigid panels ($40–60+ each)
Pre-made fabric-wrapped mineral-wool or fiberglass panels are the same dense core as the DIY version, finished nicely and ready to hang. Expect roughly $40–60 and up per finished 24-by-48-inch panel; a quality one rates NRC 0.95–1.0, the same as the raw board inside it (ATS Acoustics). You pay for convenience and looks, these are what you want on camera if you record video. Because the core is 2-inch-plus dense board, they absorb broadband, reaching down into the low-mids toward 250 Hz, territory a thin foam tile, which dies off below 500 Hz, can't touch. (For anything below about 250 Hz you need 4-inch-plus material or corner bass traps.)
6. Acoustic foam tiles (~$1–3 each)
Foam ranks last on cost-per-decibel, not because it's useless, but because it's the least efficient way to spend. A 24-pack of 2-inch foam tiles (each 12 by 12 inches) is cheap per piece, but every tile covers only one square foot (Amazon: Focusound 24-pack). And 2-inch open-cell foam tests at only about NRC 0.65, versus the 0.95-plus a 2-inch mineral-wool panel hits (Commercial Acoustics). The reason is physical: foam absorbs mid-to-high frequencies above roughly 500 Hz and almost nothing below (New York Soundproofing), because it's lightweight open-cell polyurethane, far less dense than mineral wool. It also degrades over time, going brittle and dusty after several years.
Where foam genuinely earns its place: a single small piece curved behind or beside the mic. Treatment closer to the mic gives stronger absorption, as Buzzsprout notes, so a small piece at the source can quiet the worst reflection cheaply without treating the whole room (Buzzsprout).
Foam vs blankets vs rigid panels, head to head
One lab comparison (run by a blanket retailer, so read it as directional and biased toward its own product) put a hung acoustic blanket's absorption between 2-inch and 3-inch acoustic foam, and found it beat 1-inch and 2-inch foam outright, with the blanket costing far less per square foot (VocalBoothToGo). Treat the headline with suspicion, since the seller had every reason to flatter blankets, but the direction matches the physics: a blanket covers far more wall for the money, so foam ends up costing more per square foot of actual absorption.
| Buy this | When | Skip it if |
|---|---|---|
| Soft furnishings + blankets | Speech podcast, small room, renting, tight budget | You record video and need a clean backdrop |
| DIY mineral-wool panels | You want studio results and have a weekend | You can't use tools or have nowhere to build |
| Bought rigid panels | Video podcast, you want it to look intentional | Budget is the hard constraint and audio-only |
| Acoustic foam | One small piece at the mic; tiny room touch-up | You expected it to block outside noise |

Where to put treatment first (the mirror trick)
Placement beats quantity. The highest-impact spots are your first reflection points, the wall, ceiling and floor patches where your voice bounces once before hitting the mic. To find them, sit in your recording spot and have someone slide a mirror along each surface; wherever you can see the mic in the mirror is a first reflection point. Treat those first (Soundproof Cow).
A practical starting quantity for a small room is 6–10 panels or blanket-equivalents: behind the mic, the two side reflections at head height, a small cloud on the ceiling above you, and a rug on the floor (Soundproof Cow). Bass traps in the corners come later, and only if you actually hear boominess.
Then prove it worked. Record a 20-second clip and a single hand clap in your spot before and after. If the clap's tail shrinks and the voice sounds drier, you're done, that test stops you overbuying (Soundproof Cow).
How I'd weigh this for a beginner
Spend on the room in the order above, and pair it with the right mic rather than fighting a bad room with treatment alone. A dynamic mic rejects more off-axis room sound than a condenser, which is why it's the standard recommendation for untreated home setups. If you're still choosing gear, the best budget podcast mic under $100 and a survey of podcast mics by budget tier will save you from over-spending on a mic to fix a problem that's really your room.
The order that wastes the least money: right room → rug, curtains, bookshelf → moving blankets → DIY mineral-wool panels at the reflection points → bought rigid panels only if you record video → foam only as a small piece at the mic.
FAQ
Do acoustic foam panels block outside noise?
No. Acoustic foam absorbs reflections inside a room to reduce echo and reverb; it does almost nothing to stop sound traveling through walls. Blocking outside noise is soundproofing, which needs mass and sealed gaps, a construction job (Soundproof Cow). For a speech podcast, treating echo is usually all you need.
What's the cheapest way to treat a podcast room?
Use what you own first: a thick rug on a hard floor, heavy curtains over windows, and a full bookshelf for diffusion, all at zero or near-zero cost (Buzzsprout). Add heavy moving blankets, Harbor Freight sells the 72-by-80-inch size for roughly $6–10, on the reflective walls if you need more, hung with a 2–3 inch air gap behind them. Record in a clothes-packed closet if you can, it's the closest thing to a free booth.
Are expensive acoustic panels worth it over foam?
For audio-only podcasts, often not, DIY mineral-wool panels or even blankets give similar speech-range absorption for far less (VocalBoothToGo). Bought rigid panels are worth it if you record video and want a clean, intentional backdrop, or if your room has genuine low-frequency boom that foam can't touch.
How many acoustic panels do I need for a podcast?
Start with 6–10 panels or blanket-equivalents in a small room, placed at the first reflection points: behind the mic, the two side walls at head height, a ceiling spot above you, plus a rug on the floor (Soundproof Cow). Add corner bass traps only if you hear boominess. The clap test tells you when to stop.
Does a treated room matter more than the microphone?
Largely, yes. In my experience setting up rigs from $150 to $5,000, good technique in a treated room beats an expensive mic in a noisy, echoey one: the gap between a $150 and a $1,500 setup matters less than the gap between bad technique in a bad room and good technique in a treated one. A solid starter podcast costs under $200 to build (Ausha). Treat the room first, then match it with a dynamic mic.